Are you really prepared for your Landscape Photography Trip? Find out with these tips ands tricks!
If you're the type who always ends up scrambling last-minute for gear or getting caught unprepared, well, this might be just the post you need!
Heading out for a landscape photography trip, whether it be a long or short adventure, is always determined on the right type of preparation to ensure that not only you don’t waste valuable time and money, but also (and most importantly) you stay safe and return home in one piece. Heading out with confidence, knowing you’ve got everything you need is essential for a great photography trip, so that’s why I’ve prepared the ultimate guide on what I do to get the most out of all of my landscape photography trips.
So, let’s break down how to prep for a landscape photography trip so you can focus on snagging those epic shots, not stressing about what you forgot.
Research Your Destination
Know Your Terrain:
Showing up and getting surprised by the landscape is no fun. Researching the area almost goes without saying, but it still surprises me on how many people don’t do this simple task for themselves.
Your number one friend here is of course google maps. Preferably on a desktop too. I consider myself a bit of a google earth wizard and I can’t think of any trip that I haven’t spent tonnes of time searching the satellite pics and 3D views for the best possibles spots, interesting landmarks and where the sun will rise and fall. Google maps also has photo’s in certain locations , along with street view so you can really get a sense of what to expect. Try and get to know the trails, the elevations, and any potential hazards. The more you know beforehand, the better prepared you’ll be to capture those perfect shots.
Weather Forecast:
The weather can make or break your shoot. Keep tabs on the forecast and be ready for changes. Plan around the best weather conditions to avoid a day of disappointment. Look for apps or websites that provide detailed and accurate weather updates.
If you’re going near the sea, you MUST always check the tides as this could really mean life or death. Even with knowing the tides, do not underestimate how quickly it can come in. There was a time I once did this and let's just say, if I had waited only five minutes longer, I could’ve been sleeping on a cold wet beach that night.
Remember, the weather can change rapidly, especially in mountainous or coastal regions, so be flexible with your plans.
Pack Your Gear
Camera and Lenses:
Don’t skimp here. Bring a solid camera body and a range of lenses—wide-angle for those grand vistas and telephoto for distant details. A macro lens can also come in handy for capturing intricate details in nature. Remember to bring lens hoods and caps to protect your equipment from the elements. A good quality bag is vital here to carry all this gear as it can get quite heavy. When choosing one for the first time, try and find one with quality straps and supports - this goes a long way on those big hikes!
Tripod:
Essential for long exposures and stability. A lightweight but sturdy tripod will save you from blurry shots. Look for one that’s easy to carry but can withstand strong winds. Consider a tripod with a ball head for quick adjustments and better control over your framing.
Filters:
Not the be all and end all these days in my opinion, but there’s still some filters I never leave home without. Polarising filters are essential for richer colours and reducing glare of things like water and foliage. Neutral density filters or Nd filters as they are most commonly known, are perfect for creating those silky smooth water shots and help simplify a rather unappealing rough water scene.
You can also get graduated neutral density filters which can help balance exposure in high-contrast scenes. Some photographers prefer to do this in post processing, however it can still be valuable to get control of the scene while still out there on location. Always bring a filter pouch to keep them organised and protected too - the last thing you want is scratched filters.
Extras:
Extra batteries, memory cards, lens cleaning kits, and a remote shutter release. These are all must haves for your camera bag and it only take one forgotten item to mess up your entire day - so keep that in mind. Also, pack a rain cover for your camera and a microfiber cloth for those inevitable smudges. It’s better to have backups and not need them than the other way around.
Dress the Part
Layer Up:
Early mornings and late evenings can get chilly. Dress in layers—moisture-wicking base layers, insulating mid-layers, and a waterproof outer layer. This way, you can add or remove layers as needed. A hat and gloves are essential for keeping warm, and don’t forget a good pair of sunglasses to protect your eyes from the sun and glare. I also always keep a spare beanie and spare pair of socks in my bag. You will thank me later for this.
Footwear:
Sturdy, waterproof hiking boots are essential. Your feet will be happy, and you’ll be able to trek comfortably. Look for boots with good ankle support and a solid grip. Break them in before your trip to avoid blisters. One of my favourite buys was a pair of hybrid aqua shoes. These shoes are basically hiking shoes with a great, grippy sole but with plenty of drainage ports to quickly release water. Pair these up with waterproof socks and there won't be a waterfall that’s too challenging! Wool socks are also a great item to have and can help keep your feet warm and dry.
Gloves:
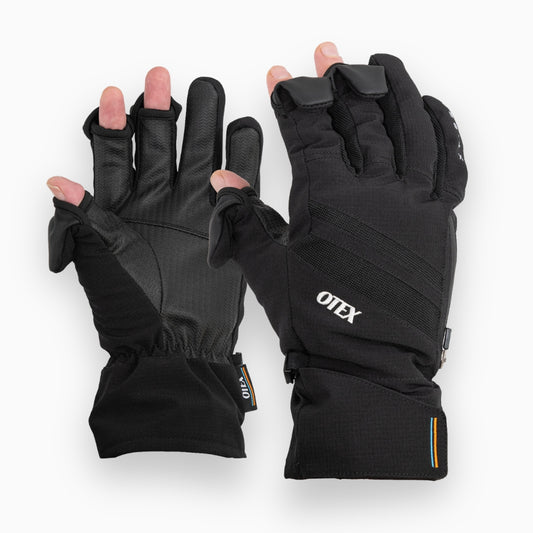
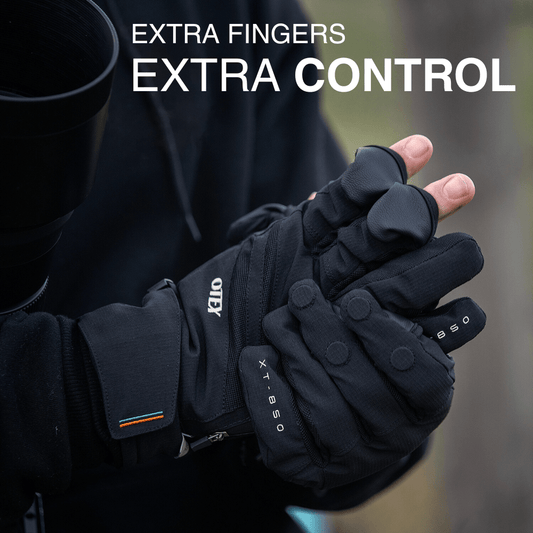
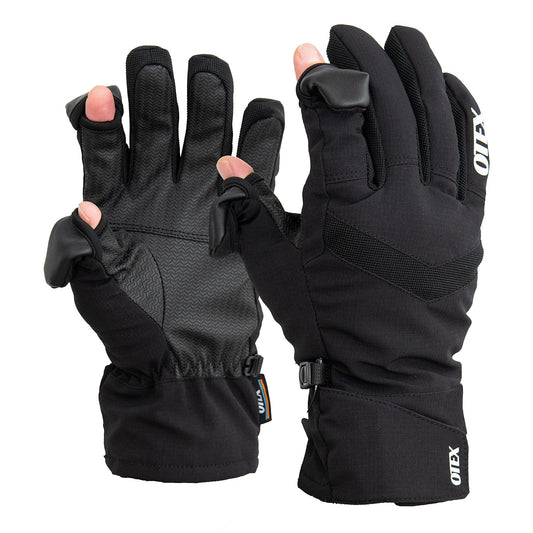
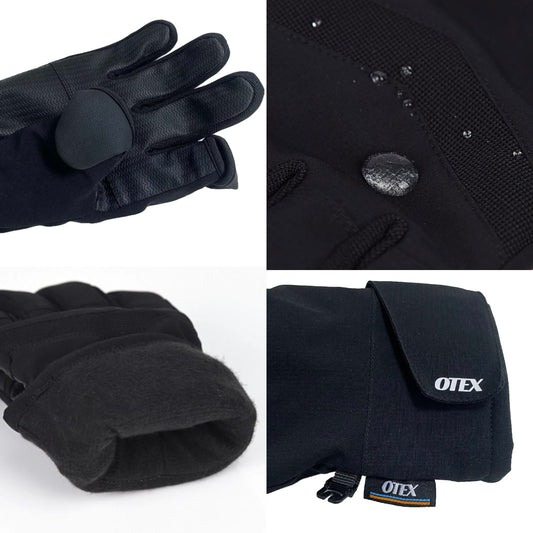
You’ll be surprised how quickly your hands get cold while out in the elements. Keeping your hands warm is a must as they are the one thing that handles your camera and all other expensive equipment. Finding gloves with flip-lock thumb and index fingers will make it easy to adjust settings without having to take your gloves off and freeze your fingers off. Also try and find gloves that are waterproof because once those hands are wet, it will take ages for them to warm up.
Pack Wisely
Backpack:
As mentioned before, a weather-resistant backpack with compartments for your gear is a lifesaver. Comfort and organisation all in one. Make sure it has padded straps and a supportive frame for long hikes. A rain cover is a must to protect your gear from unexpected showers. Having quick-access pockets can make grabbing your camera a breeze - prefer my camera to be accessed from the back - this way when you lay your bag on the ground to get your camera out, all the dirt wont transfer over you clothes when you pick up your bag again.
Stay Hydrated and Fed:
Bring plenty of water and high-energy snacks. You’ll need the energy for those long hikes and shooting sessions. A hydration pack can be a convenient way to carry water. Pack snacks like nuts, dried fruit, and energy bars that provide sustained energy without taking up much space.
Navigation Tools:
Map, compass, and GPS. Don’t rely solely on your phone’s battery in the wild. Familiarise yourself with the area and have a plan for your route. Mark key spots on your map, including potential shooting locations and emergency exits. Always have a backup navigation method in case technology fails.
Plan Your Shots
Scout Locations:
Take time to explore and find the best spots. Look for interesting compositions and note how the light changes. Use apps like PhotoPills or The Photographer’s Ephemeris to plan your shots based on the sun’s position. Keep an eye out for unique features or hidden gems that others might miss.
Golden and Blue Hours:
These times offer the best natural light. Plan your shoots around these periods for stunning results. The soft, warm light of the golden hour can add a magical touch to your photos. The blue hour, just before sunrise and after sunset, provides a cool, tranquil atmosphere. Timing is everything in landscape photography.
Patience: Good photography takes time. Wait for the perfect moment and revisit spots for different lighting conditions. Don’t rush the process. Sometimes, the best shots come after waiting for the light to be just right or the clouds to align perfectly. Embrace the process and enjoy the journey.
Safety First
Inform Someone:
Always let someone know your plans and expected return time. Safety is crucial and this is essential if travelling by yourself. Share your itinerary with a friend or family member and check in regularly if possible. This precaution can be a lifesaver in case of emergencies.
Emergency Kit:
Basic first-aid, a multi-tool, and a whistle. Better to have it and not need it than the other way around. Include items like band-aids, antiseptic wipes, pain relievers, and a thermal blanket. A multi-tool can come in handy for various unexpected situations. In Australia, we have some of the deadliest snakes in the world so I always have my snake bite kit close by. It’s also a good idea to do some training to learn what to do if such an event should occur.
PLB:
I never leave without my PLB. A PLB stands for Personal Locating Beacon and it uses GPS to send a signal to emergency services should you get in trouble. For the sake of a couple hundred dollars, this could be the one most important thing to have in your kit. Get one today. Just do it.
Stay Alert:
Be aware of your surroundings. Wildlife and sudden weather changes can be unpredictable. Respect local wildlife and maintain a safe distance. Always be prepared for sudden weather shifts, especially in remote areas. Keeping a weather eye out can help you stay ahead of any potential dangers whether it be bushfires, floods or severe storms - all of which could come out of nowhere and get you into serious trouble if you’re not prepared.
Conclusion
Photography trips are one of the reasons landscape photography is so addictive. However, without the correct preparation, your trip can quickly turn into a nightmare. Prepping for a landscape photography trip means thinking ahead and being thorough. Research your destination, pack the right gear, dress appropriately, and always put safety first. With the right preparation, you can focus on capturing stunning landscapes and enjoying the adventure. Afterall, that’s what it’s all about! Happy shooting!

OTEX Accent XT-801 gloves aren’t just for photographers. Whether you’re hiking, camping, fishing, or just strolling to the coffee shop, these gloves are the ultimate outdoor accessory. Say goodbye to frostbite and hello to warm, functional hands.

All images are stock images or by the author.
Featured Products
OTEX XT-850 Premium Gloves
- $109.95
$119.95- $109.95
- Unit price
- / per
OTEX XT-801 Photography Gloves
- $89.95
$89.95- $89.95
- Unit price
- / per


