

How to Take Your Photography to the Next Level – Step by Step
Ready to push your photography beyond the basics?
There’s a moment that hits every photographer—somewhere between your 200th “pretty good” landscape and another folder of meh shots you never post. It’s when you realise you’ve hit a plateau. Your photos are solid. Your gear’s decent. But something’s missing. They don’t pop. They don’t tell a story.
Here’s the truth: taking your photography to the next level isn’t about the camera. It’s about your workflow.
That means how you plan, how you shoot, and how you process your images after the fact. So here’s your no-fluff roadmap to sharper, smarter, more intentional photography—backed by years in the field and written for the kind of shooters who chase light through rain, snow, and pre-dawn fog.
Let’s break it down.
1. Plan with Intention – Don’t Just Wing It
If you want to capture better photos, you need to stop relying on luck. The best images aren’t stumbled upon - they’re hunted down with intent. That means planning every shoot like it matters, whether it’s a quick sunrise at the local lookout or a week-long road trip through the mountains.
Start by scouting your location. Use Google Earth or Instagram geo-tags to get a feel for the lay of the land. Apps like PhotoPills or The Photographer’s Ephemeris let you track sun angles, golden hour timing, moon phases, and even Milky Way alignments. This isn't overkill - it’s how serious shooters stack the odds in their favour.
And then there’s the light. If you’re just chasing sunsets because they look good on Instagram, you're leaving half the magic on the table. Study how light behaves - harsh mid-morning sun versus the soft, diffused tones of an overcast afternoon. Learn to work with blue hour, foggy mornings, and moody skies. That’s where you create atmosphere - not just exposure.
Finally, ask yourself before every shoot:
What story am I telling here?
Are you chasing drama? Isolation? Movement? Warmth? Answer that, and your framing, exposure, and editing decisions suddenly start to align.

2. Gear Up Smart (Not Heavy)
Let’s bust a myth: more gear does not make you a better photographer. If anything, it slows you down. Great photography gear is about usability, durability, and purpose - not how much you can cram into a backpack.
Here’s how to keep it simple and effective. Bring two lenses max: a wide-angle for dramatic landscapes and a mid-telephoto for compression and isolation. A sturdy tripod. A few ND filters if you’re planning on long exposures. Extra batteries and cards (obviously). That’s it.
But beyond camera gear, it’s what you wear that really matters when you’re out shooting for hours in the wild. If your hands are frozen or your boots are soaked, you’ll either rush or quit. That’s why photography gloves for cold weather - like the OTEX XT-850s - and ultra-warm beanies are essential. They’re not just accessories. They’re tools that keep you sharp and functional in real-world conditions.
Because let’s be honest: if you’re not comfortable, you’re not focused. And if you’re not focused, you’re missing shots.
Outdoor Photography Gear Tips:
-
Wear functional gear like OTEX photography gloves, warm beanies, and lightweight layers. You’ll shoot longer and stay focused.
-
Don’t forget battery packs and lens cloths - especially in cold, damp conditions.
-
Use a small camera bag with a layout that helps you move fast and stay nimble.

3. Shoot with Creative Discipline
The difference between decent photos and bangers? Intentional shooting.
You’re on location. The scene is in front of you. The light is right. This is where most people start spraying and praying - rapid-firing in all directions and hoping one shot turns out. Don’t be that person.
Slow down. Breathe. Observe. Then compose with care. If you want to know how to shoot better outdoor photos, it starts with intention. Think about the lines in the scene. Where is your subject? Where does the eye go? What doesn’t need to be in the frame?
Composition is a muscle. You build it by doing reps with purpose, not by clicking without thinking. Use the rule of thirds, sure - but know when to break it. Centre a subject in fog. Use negative space. Get low. Get weird.
And then there’s motion. One of the most overlooked ways to add life to your shots is playing with shutter speed:
-
As waves crash in, use 1/4 to 1/6 of a second for that balance between blur and structure.
-
As water flows out, go longer - 1 to 2 seconds, to create that dreamy wash.
-
Want chaos? Try a handheld 1/15 shot and embrace the blur.
It’s not about rules - it’s about recognising what the scene needs.
Tough weather? Good. That’s where emotion lives. Don’t fear the rain, snow, wind, or fog. Just be ready for it. That’s where cold-weather photography gear earns its keep.

4. Edit to Enhance, Not Overwhelm
Here’s the harsh truth: most photos are ruined in post.
Too much contrast. Clown-coloured skies. Halos around mountains. The original shot may have been great, but over-editing kills it.
The first step to a clean edit? Cull ruthlessly. Delete the weak ones early. Keep only the frames that have something to say. Be honest with yourself - if it’s just “nice,” it’s not enough.
Then move to your edit. Start with basic corrections:
-
Fix the white balance
-
Adjust contrast and exposure
-
Use curves sparingly
-
Dodge and burn for subtle emphasis
Maintain the integrity of the light you saw. Don’t try to make a dull scene dramatic with saturation. If it wasn’t there in the field, don’t fake it - learn from it and plan better next time.
And here’s where you separate yourself from the amateurs: develop a consistent editing style. A subtle, recognisable tone that says, “This is mine.” It might be warm tones, soft contrast, dark greens, or cinematic blues. Just make it yours.

5. Review, Print, and Improve
Want to know the most underrated way to improve as a photographer? Print your work.
When you see your image on paper - big, bold, and in natural light - you spot things you’d never notice on a phone screen. Framing flaws. Colour balance issues. Soft focus. Or maybe… just maybe… something special.
Print five of your best images and pin them to your wall. Not to brag - but to learn. Do they hold up? Do they feel like you?
Then, go back. Revisit your old folders. See where you’ve improved. Where you’ve stayed stagnant. Where your best work came from - and what conditions helped you get there.
This reflection process is where style, discipline, and confidence are forged. Don’t skip it.

Bonus: Weatherproof Your Workflow
Let’s face it - great shots don’t happen when it’s convenient. They happen in sideways sleet, at 5:20am, when the wind makes your fingers go numb and the fog’s rolling in sideways.
That’s why OTEX gear exists. Built by outdoor shooters for outdoor shooters, our gloves, beanies and accessories are designed to keep you shooting when everyone else is packing up.
Because when the cold sets in, the OTEX gear gets to work.

Final Thoughts
If you’re wondering how to take your photography to the next level, the answer isn’t buried in YouTube tutorials or hiding inside a $3,000 lens. It’s in your workflow.
Plan better. Shoot smarter. Edit with intention. And above all - stay uncomfortable. That’s where growth lives.
And when you’re out chasing light in freezing wind with numb fingers and a full memory card - make sure your gear is built to match your ambition.
Ready to upgrade your outdoor photography game?
Explore our full range of pro-level gloves, beanies, and field-tested accessories at 👉 otexoutdoors.com.au
Featured Products
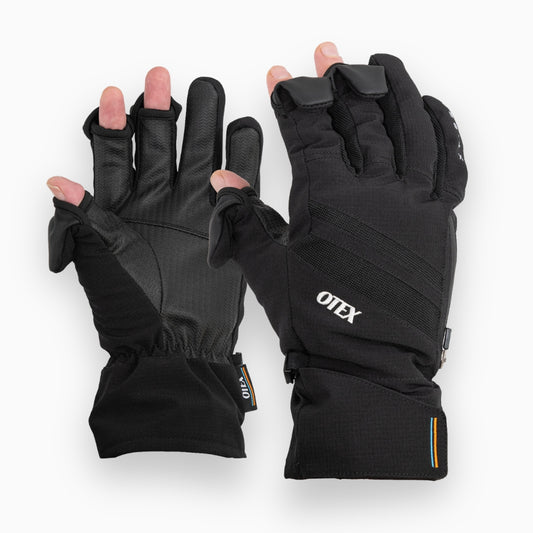

XT-850 Premium Photography Gloves
- $119.95
$119.95- $119.95
- Unit price
- per
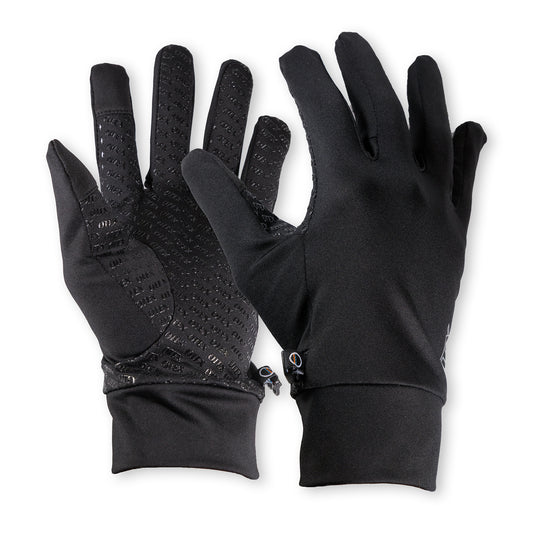

XT-Active PRO Inner Gloves
- $54.95
$54.95- $54.95
- Unit price
- per