

How to Get the Best Out of Your MT-1000 Photography Mitts
When you're photographing in genuinely cold conditions, keeping your hands warm can become just as important as keeping your batteries charged.
The OTEX MT-1000 Photography Mitts were designed specifically for photographers working in sub-zero temperatures, combining serious warmth with the ability to quickly access your fingers when you need precise control of your camera.
Rated to -25°C, the MT-1000 is our warmest photography handwear solution, designed for winter landscape photography, astrophotography, wildlife photography, alpine conditions and long periods standing around waiting for the right light.
But like any piece of technical cold-weather gear, knowing how to use your photography mitts properly can make a significant difference to their performance.
Here are our recommendations for getting the best warmth, comfort and usability from your MT-1000 Photography Mitts.

Start With Warm, Dry Hands
This is probably the single most important tip for any winter photography gloves or mitts.
Insulation works by helping retain the warmth your body is already producing. If your hands are already freezing when you put your mitts on, they have a much harder job to do.
Whenever possible, put your MT-1000s on before your hands become cold.
If you've just arrived at your location, get your gloves on while you're still warm from the car or from walking. If your hands are already cold, get some circulation back into them first by moving around, gently moving your fingers or warming your hands somewhere sheltered.
Just as importantly, make sure your hands are dry. Moisture inside any insulated glove system can significantly reduce comfort during a long winter photography session.
Warm hands in = a much better chance of warm hands throughout your shoot.
Layer Your MT-1000s for Maximum Warmth
One of the best ways to get maximum performance from the MT-1000 is to use a layering system.
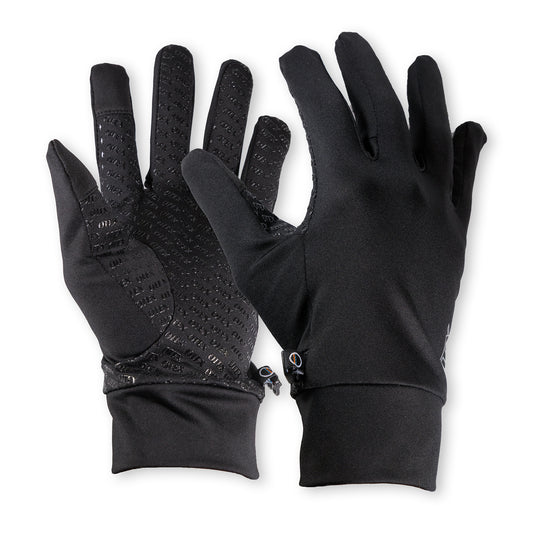
The MT-1000 Photography Mitts are designed to pair particularly well with our XT-Active Pro Inner Gloves.
The inner gloves provide an additional lightweight layer between your hands and the outside environment. More importantly for photographers, they mean that when you unzip and fold back the mitt to operate your camera, your fingers don't have to be completely exposed.
This can make a big difference during sub-zero photography, particularly when photographing auroras, stars, wildlife, snow landscapes or sunrise scenes where you may be outside for several hours.
Think of it in the same way you dress the rest of your body for winter:
Base layer + insulating layer + protective outer layer.
Your hands can benefit from exactly the same approach.

Use the Hand-Warmer Pocket
For particularly cold conditions, the MT-1000 includes a large zip pocket positioned behind the fingers specifically for a hand warmer.
This is one of the easiest ways to add another level of warmth during an extended cold weather photography session.
Activate your hand warmers before arriving at your location and place them into the pockets. You can also use them to pre-warm your mitts before putting them on.
That can be particularly useful when you're leaving the warmth of your accommodation or vehicle for a pre-dawn shoot.
Rather than putting warm hands into freezing cold mitts, you're starting with both your hands and your photography mitts already warm.
For long stationary shoots where your body isn't generating much heat through movement, hand warmers can be especially useful.

Understanding the MT-1000 Zip-Back System
The MT-1000 uses a full zip-back mitt design.
Instead of removing the entire mitt every time you need access to your camera, you can unzip the finger section, fold the mitt back and access your camera controls directly.
Because this opening forms an important part of the mitt's protection, the zipper can feel quite firm when the MT-1000s are new.
This is normal, and there are a few things you can do to make operation easier.
Wear the Zipper In Before Your First Big Trip
We strongly recommend becoming familiar with the zip system before heading into extreme conditions.
At home, with the mitts at room temperature, slowly open and close each zipper several times.
Don't aggressively pull or force the zipper.
Instead:
-
Keep the zipper track relatively straight.
-
Pull the zipper in the same direction as the track rather than sideways.
-
Use your other hand to support the mitt while operating the zip.
-
Move steadily rather than trying to rip the zipper open quickly.
This gives you a chance to become familiar with the movement while also naturally wearing in the zipper and surrounding materials through normal operation.
By the time you're standing on a mountain at -10°C in the dark, you don't want that to be the first time you've practised opening your mitts.
Don't Force a Tight Zipper
If you feel excessive resistance, don't simply pull harder.
Back the zipper off slightly, make sure there is no fabric caught around the zipper and try again while keeping the zipper track aligned.
Pulling sharply sideways puts unnecessary pressure on the slider and zipper track.
Cold conditions can also make materials feel stiffer, which is another reason we recommend practising and wearing the zipper in at room temperature before heading into the field.
A little preparation makes operation much easier once you're wearing the mitts.
You Don't Need to Keep Zipping and Unzipping While Shooting
One of the biggest advantages of the MT-1000 is that you don't need to fully zip and unzip the mitt every time you want to change a camera setting.
When you're actively shooting, simply unzip the mitt and fold the finger section back to expose your fingers.
This gives you the dexterity you need to adjust aperture, shutter speed, ISO, focus, filters or other camera controls.
Once you've made your adjustments, you can simply flip the mitt section back over your fingers without zipping it closed.
This creates a quick protective cover between shots, helping retain warmth while still allowing you to uncover your fingers again in seconds when you need to make another adjustment.
This can be particularly useful during long exposures, astrophotography, sunrise or sunset photography, or any situation where you're regularly moving between adjusting your camera and waiting for the next shot.
If you're using inner gloves as part of your layering system, they can also provide an extra layer of protection while your fingers are exposed.
A practical shooting workflow might look like this:
Walking, waiting or in wet conditions → mitt fully closed and zipped
Changing camera settings → unzip and fold the mitt back
Waiting between shots → flip the mitt back over your fingers, but leave it unzipped
Ready to shoot again → simply flip it back open
Finished shooting or conditions turn wet → zip the mitt fully closed
This reduces unnecessary zipper use while also helping minimise how long your fingers are exposed to the cold.
In dry conditions, you may find that leaving the zipper open while actively shooting is the fastest and most comfortable way to work. When you're finished, moving locations, standing around for longer periods, or shooting in rain or snow, simply zip the mitt closed again for maximum warmth and weather protection.

Keep Finger Exposure to a Minimum in Extreme Cold
The ability to expose your fingers is what gives the MT-1000 its dexterity, but in extreme cold, the less time your fingers spend uncovered, the easier it is to retain warmth.
In moderate conditions, brief exposure may not make much difference. At -10°C, -15°C or below, however, small habits can have a noticeable impact over a long shoot.
Where possible, prepare before exposing your fingers. Position your tripod, choose your lens, roughly compose your shot and have your camera ready to go.
Then fold the mitt back when you need the additional dexterity to fine-tune your settings or operate your camera.
Once you've made your adjustments, simply flip the mitt section back over your fingers while you wait for the next shot. You don't necessarily need to zip it closed each time — leaving it unzipped gives you quick access again while still providing additional warmth and protection between adjustments.
For longer periods of waiting, when moving between locations, or when conditions become wet or particularly cold, zip the mitt fully closed for maximum warmth and weather protection.
This approach is particularly useful for astrophotography, aurora photography and long exposure landscape photography, where you may regularly alternate between making small camera adjustments and waiting several minutes for the next exposure.
Use the Flip-Back Thumb Strategically
The separate flip-back thumb gives you another level of flexibility when operating your camera.
There may be plenty of situations where you only need access to your thumb rather than exposing your entire hand.
Camera joysticks, buttons, dials and touchscreens all require different levels of dexterity, so experiment with your setup and work out how much access you actually need.
The thumb flap also includes a small pull tab to help you bring it back into position while you're still wearing the mitts. This makes it easier to close the thumb opening without having to remove the mitt or struggle with the flap.
Once you've finished making your adjustment, pull the thumb section back into place to help retain warmth.
The less skin you expose to cold air, wind and moisture, the easier it is to maintain warmth over a long shooting session.

Seal Out the Weather
The MT-1000 combines a weather-protective outer shell with a HIPORA® waterproof membrane and heavy-duty 3M™ Thinsulate™ insulation.
To get the best protection from wind, snow and rain, make use of the mitt's adjustable closure system.
The quick-release wrist adjustment strap allows you to secure the mitt comfortably around your wrist, helping reduce unwanted movement and limiting cold air from entering around the hand.
The quick-release elastic cuff cinch can then be tightened around your jacket sleeve to help create a more secure barrier against wind, snow and moisture.
For the best result, make sure your jacket sleeve and mitt cuff overlap properly before adjusting the cuff strap.
In wet, windy or snowy conditions, keep the zip-back finger section and thumb closed whenever you don't need access to your camera controls. When conditions become particularly wet, fully zip the mitt closed to maximise weather protection.
Use the Retention Leash
The integrated retention leashes aren't just there so you don't lose your mitts.
They're particularly useful when you're managing tripods, filters, lenses, backpacks or other photography equipment.
Secure the leashes before starting your shoot. Then if you need to completely remove a mitt for a particularly delicate task, you can simply let it hang from your wrist rather than putting it on wet ground, snow or a rock.
The attached carabiner also makes it easy to secure the MT-1000s together or attach them to your pack when you're not using them.

Find Your Own Shooting System
Every photographer works a little differently.
Some make constant adjustments to settings and composition, while others set up their shot and barely touch the camera for the next 20 minutes.
Before heading out on your first serious cold-weather shoot, spend some time getting familiar with your MT-1000s and work out the system that feels most natural for you.
Practise:
-
Opening the zip-back mitt while wearing it.
-
Folding the finger section back for camera access.
-
Flipping the mitt back over your fingers between shots without necessarily zipping it closed.
-
Operating your most-used buttons, dials and controls.
-
Using the flip-back thumb and its pull tab.
-
Fully closing and zipping the mitt when maximum warmth or weather protection is needed.
-
Adjusting the wrist strap and cuff cinch for a comfortable, secure fit.
-
Using the retention leash when you need to remove a mitt completely.
If you use inner gloves as part of your cold-weather layering system, it’s also worth practising your camera controls while wearing them.
The more familiar these movements become, the less you’ll need to think about your mitts when conditions turn cold. The goal is for the MT-1000 to become a natural part of your photography workflow, allowing you to concentrate on the scene and the shot rather than your hands.
Maximum Warmth: The Complete MT-1000 Setup
If you're heading into genuinely cold or sub-zero conditions, our preferred setup is simple:
Start with warm, dry hands.
Wear XT-Active Pro Inner Gloves underneath your MT-1000 Photography Mitts.
Pre-warm the mitts if possible.
Place activated hand warmers in the dedicated pockets.
Keep the mitt closed or folded over while walking, waiting or standing around.
Only expose your fingers when you actually need the additional camera control.
During periods of active shooting, leave the zip-back section unzipped rather than repeatedly opening and closing it.
Then close everything back up as soon as you're waiting again.
It sounds simple, but these small habits can make a huge difference during a long day of cold weather photography.

Built for the Moments When Ordinary Photography Gloves Aren't Enough
The MT-1000 Photography Mitts were created for photographers who need more warmth than a conventional photography glove can provide.
Whether you're photographing the Milky Way on a freezing alpine night, waiting beside a tripod for a winter sunrise, shooting wildlife in snow or standing beneath the Northern Lights, the principle remains the same:
Protect your hands when you can. Access your fingers when you need to.
Get that balance right and your MT-1000s can help you stay comfortable, stay outside longer and keep concentrating on what actually matters — getting the shot.
More warmth. Same control.
OTEX MT-1000 Photography Mitts — purpose-built cold weather photography mitts for photographers who don't stop shooting when the temperature drops.
Featured Products

XT-850 Premium Photography Gloves
- $119.95
- $119.95
- Unit price
- per
XT-Active PRO Inner Gloves
- $54.95
$54.95- $54.95
- Unit price
- per